
The first side is roughed-out. The Evo case has plenty of meat so there’s much less chance of breaking through than on a standard casing
Just to recap
In part 1 Sticky talked us through the various Vespa smallframe casing options from SIP and started modifying things for our endurance race engine. Now the fun really starts…
Rebuilds 1 to 3
Our engine was rebuilt by transferring pretty much everything out of the old casings and into the new casing. In theory it should have been easy, but it wasn’t. For a start it took a few goes to grind away sufficient material for the con-rod to rotate without touching the casing.
The symptom we ended up battling was a horrible clunking sound and lurching feeling when the clutch was being released. It honestly felt like the gearbox was going to explode so we began a process of working backwards from the rear wheel.
Issue #1 – Bent Output Shaft
The 4th gear cog appeared to be lightly contacting the engine casing but not all around its rotation. With the full gearbox removed and spun on balancing rollers it was possible to see that the gears were turning slightly eccentrically. The diagnosis was a slightly bent layshaft. With another layshaft fitted and the gearbox re-shimmed the gears now spun concentrically. Problem #1 solved.
Issue #2 – Mix-and-don’t-match
In the tuning world, manufacturers tend to design full sets of components that they only ever test for compatibility with their own parts. For instance Malossi would not give a shit if something they made did not work with a Polini part. It is their expectation that you would use all Malossi stuff and hopefully then you should have no problems. Unsurprisingly, it often works out that way too.
Scooterists however, tend to think in a different way. They would rather buy the best (or possibly cheapest) on the market no matter who makes it. This leads to problems.
A perfect example of this is our choice for a Fabbri FB36 clutch and primary drive basket together with front drive sprockets from Crimaz. I like the Fabbri transmission parts. They have proved their reliability in at least four previous 6-hour races. Admittedly the all-aluminium clutch tends to dirty the gearbox oil quite quickly, but that’s never been a deal-breaker.
I also like the Crimaz interchangeable primary drive gears (‘pinions’) because they fit directly to the crank with a cone fit (like a Lambretta rear hub) rather than a silly Woodruff key. Better still, they are drilled and threaded so you can use a 3-bolt puller to extract and swap them (again like a Lambretta rear hub).
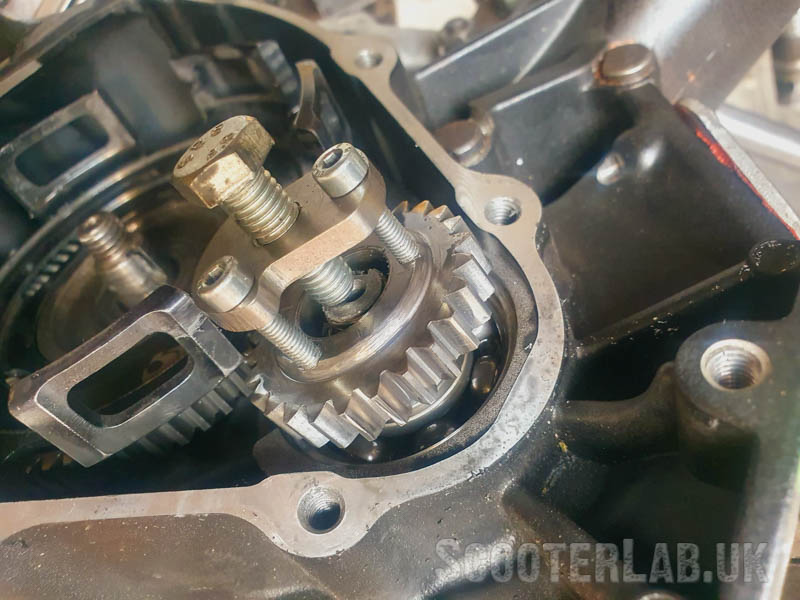
Crimaz cone-fit primary pinion and extractor
The difficulty stems from the fact that Crimaz drive gears touch the Fabbri clutch basket when you fit both of these parts together. If you fit a Crimaz gear with a Crimaz cutch basket then there’s no problem. If you fit a Fabbri clutch basket with a normal drive pinion then there’s no problem either.
I’m not cynical enough to believe that these manufacturers designed their parts to clash, but the end result is that if you want to run both parts together then you need to do some serious grinding to the outside of the basket and the top of the drive cog to get sufficient clearance.
I’d noticed this problem and relieved the top of the pinion prior to the previous race, but perhaps not sufficiently as there were still signs of the cog and clutch basket touching, so a more thorough job was required.
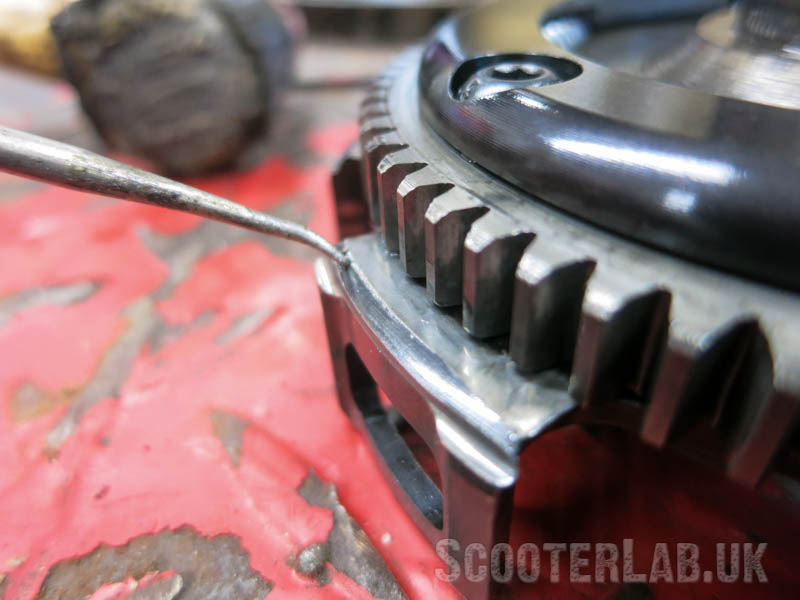
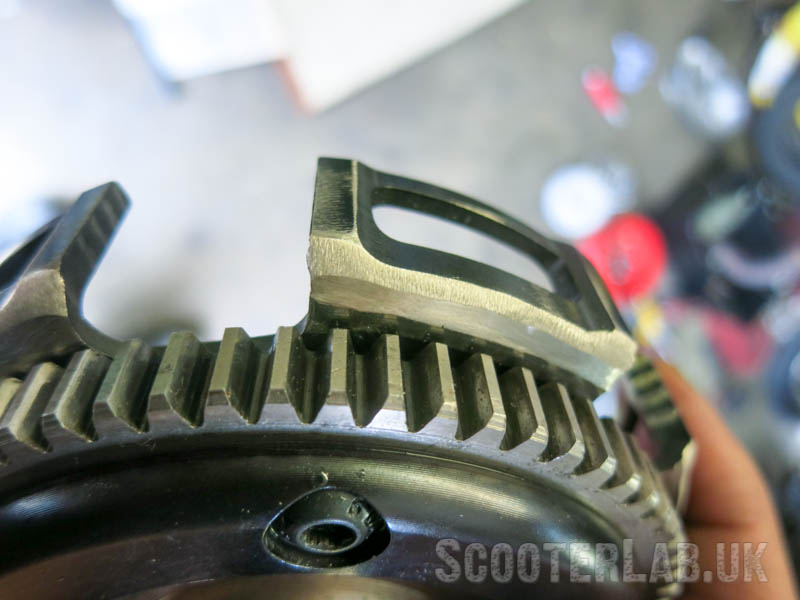
The clutch basket after further machining to increase clearance
Issue #3 – Gear cluster clash
To cut a very long story short, it turns out that the vast majority of the problems we encountered stemmed not from the SIP casings themselves, but from incompatibility of parts from different manufacturers.
The gearbox crunching, lurching problem remained present when you pulled the clutch lever even after the THIRD rebuild. It took a night’s sleep to diagnose the issue.
While the gearbox span freely by hand it was clearly locking up with the additional pressure of the clutch action. The crunching noise was the engine compressing the cush-drive springs in the primary basket and then suddenly releasing as the gearbox turned and freed. Each time it did this it was like a hammer blow to the transmission.
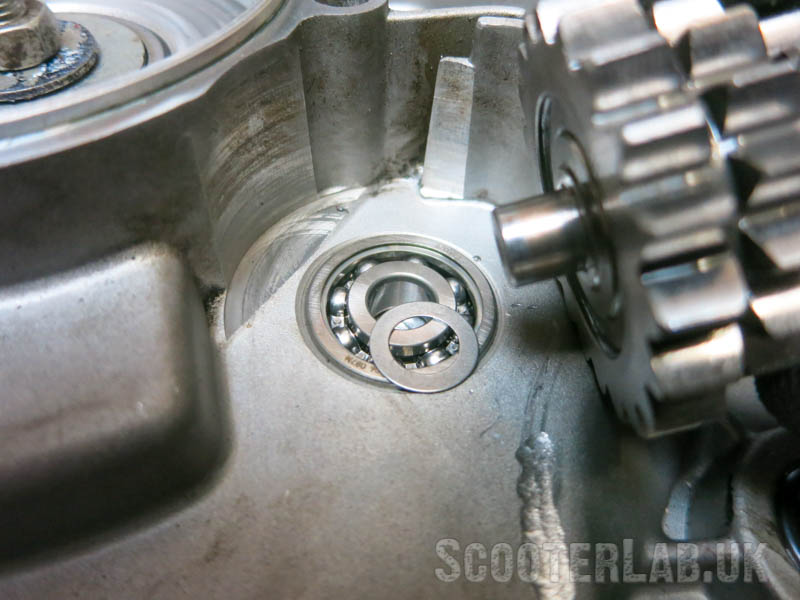
You can see where the DRT gear cluster has been contacting the casings. Sometimes this contact can be corrected by adding a thin shim before the cluster is fully fitted
The only thing it could be was the gear cluster (‘Christmas Tree’) binding on the casing once the additional pressure of the clutch springs was applied to the end. The gearbox span fine by hand with the clutch removed but you can’t test it with the clutch fitted except by running the engine.
At this point I must add a few more bits of information before pointing any fingers:
• The ‘Christmas Tree’ gear cluster in question is not standard, but a close ratio DRT one
• This issue of non-standard gear clusters rubbing the engine casing sometimes also happens with standard engine casings
• The most common solution amongst engine builders is to place a thin shim on the 10mm shaft end of the gear cluster before it fits into the bearing. This lifts the gear cluster away from the casing, and also lifts up the clutch away from the basket (if you ever have clearance problems there). 10mm I.D. shims are available in 0.1, 0.25, 0.3 and 0.5mm thicknesses to help with this problem
• The limitation to fitting shims under the gear cluster is that if you lift it too far then the cluster permanently catches on the kickstart gear, which can be heard as clicking when you spin the gearbox
We only had a 0.5mm shim to try and that was too thick; raising the gear cluster to the point of clicking on the kickstart gear.
This left the only solution of increasing clearance by grinding some material out of the casing.
At this point it’s worth mentioning that this appears to be more of a DRT-compatibility issue than a SIP casing issue, because when I went back and checked the Piaggio casing, there were faint rubbing marks from the DRT cluster in that too.
After grinding some extra clearance for the cluster, the engine went back together and the transmission worked perfectly. Back in the game.





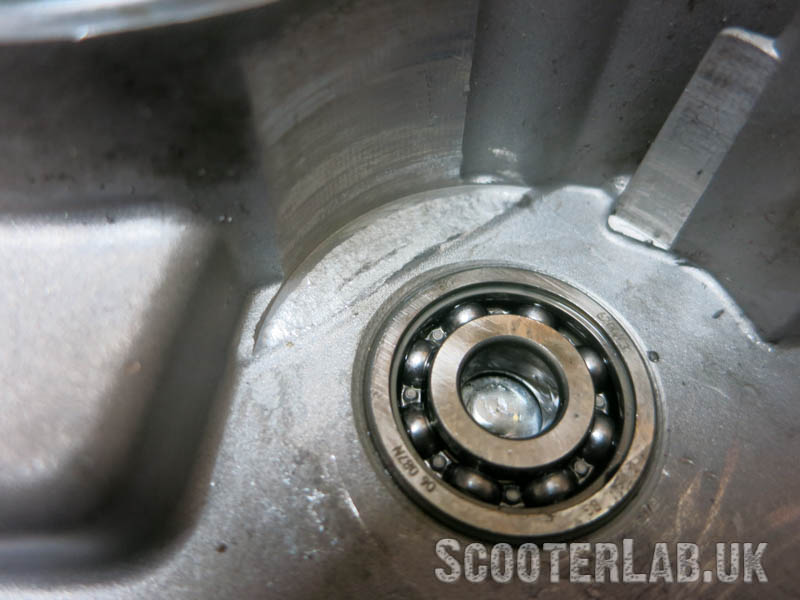
Grinding was a slow process of refitting the gear cluster, checking for wear marks and grinding again until there was enough clearance. This bearing was very tight to fit in our casing
SIP Casing Issue #1
In the end, we only found two problems with the SIP casings worthy of mention. The first, which other people have confirmed, is that the hole for the gear cluster ball bearing was undersized and very tight. Even with a casing heated to 150C over a gas cooker it still took a drift to fit a bearing straight from the freezer.
Other builders tell us that they have experienced the same issue. Andre from SIP is aware of the problem. He explained that it can be resolved by fitting and removing a bearing several times or even lightly sanding the hole. He also assured us that this issue will be resolved in future batches.
ONE TO WATCH: Do not attempt to remove this ball bearing if it is tight in the casings without a specific puller or slide hammer! SIP Sell a suitable tool for removal of this bearing.
SIP Casing Issue #2
The second problem we found is that the engine would not fit in the chassis as the silent blocks pre-fitted to the SIP casing were 3mm longer in total (1.5mm per side) than the mounts of the previous Piaggio casing. Andre explained that the pre-fitted mounts are supplied by Piaggio but it is still possible that they are slightly too long. My advice would be to try the engine in your chassis first and if it doesn’t fit simply file some material off the ends of the tubes in the silent blocks.
Again, SIP are now aware of this issue and plan to deal with it in the future.

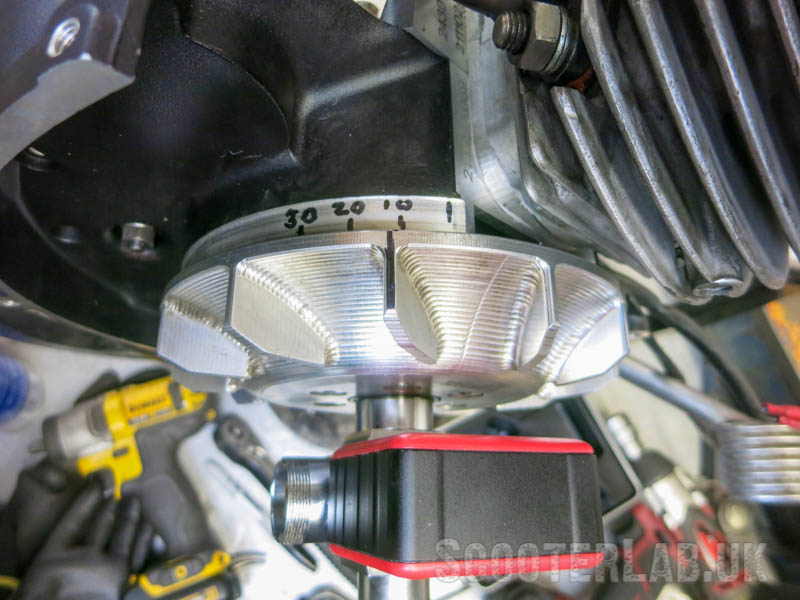
Verdict
Overall the SIP Casings – which began as a project with Oliver Hellwig of Grand Sport pistons fame – introduce so many small upgrades and shortcuts to building tuned smallframe motors that it’s easy to forgive the few issues that we encountered. Also, it’s not hard to work around them once you know where they are. Neat little touches like the increased tyre clearance and a bushed gearchange are better than Piaggio’s originals.
The main advantage of the Evo version of the SIP case is that it avoids the need to weld the cases in preparation for porting. This is helpful because talented aluminium welders are not easy to find, and even the best can still introduce unwanted distortions into a previously good casing.
Building a kit onto a new casing alleviates all the problems of wear and damage that you commonly find on 40-year-old engines. It seems that many regular engine builders are in agreement. Polini, Parmakit, Egig and Barone all use SIP casings for building motors based on the standard cylinder stud pattern.
While standard style SIP casings start at around £350, the ‘Evo’ versions start around £375. For a tuner, that’s a difference well worth paying.
Sticky
PROS:
• Versions to suit almost any application
• Engine mounts pre-fitted
• Casing swingarm permits fitment of 3.50-10 rear tyre
• ‘Evo’ version completely flat around cylinder gasket face
• ‘Evo’ version has even more ‘meat’ in the flywheel casing for porting
• Stud positions seem precise
• Replaceable bronze gearchange bush is a good solution
CONS:
• ‘Evo’ version requires modification of the stator plate (other versions don’t). Note that you can buy a specific base plate for the SIP Vape ignition
• ‘Evo’ version leaves the stator area below the flywheel open to the elements
• Engine mounts were significantly wider than the Piaggio casing (current stock)
• Gear cluster bearing hole very tight (current stock)
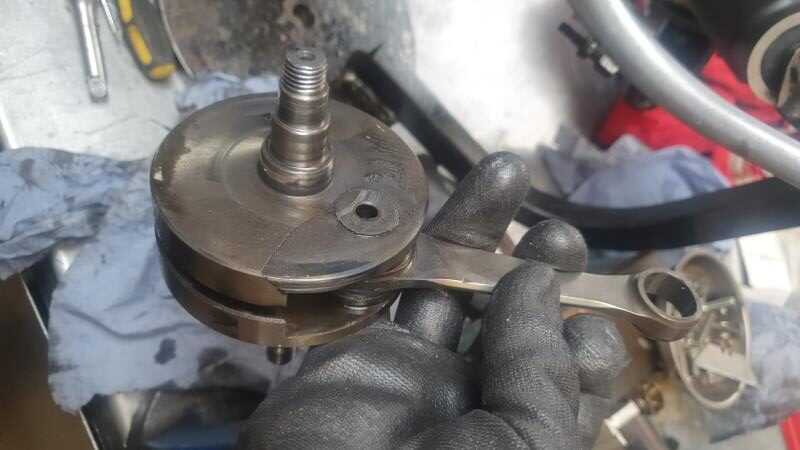
Postscript: If you read our report on the Tside6 8-hour race then you’ll know by now that the engine worked fine and we were leading for 6 hours until the crankshaft broke (admittedly after a decade of abuse). The cracked crankshaft web carved away at the new casing like a fly cutter but as it’s a reedvalve kit that’s not a big problem. This engine will live again. The crankshaft will not.